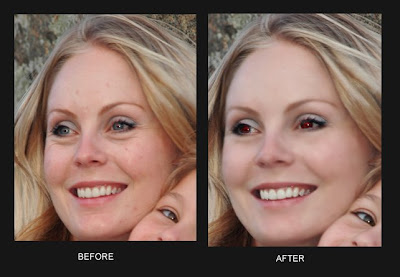
Airbrush your photos in Photoshop - Quick and easy
First start with a picture (unprocessed/filtered),scanned or from digital camera.
For example : This pretty lady
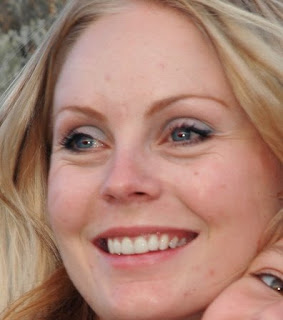
Step 1
After opening image up in Photoshop, the first thing we will do is to use the Heal Brush to remove any obvious marks, scars, blemishes. Be as thorough as you like here, as the cleaner the skin is to start with, the better the results at the final step .
Use an appropriate brush size (try 13 small) in order to sample and brush away the blemishes and bad marks without losing any important detail.Try to get all the bad areas , including wrinkles (crowsfeet), etc.
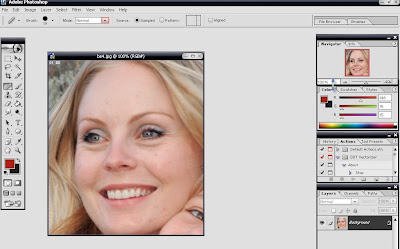
Step 2
Once you are finished with the Heal Brush, duplicate the layer and apply the Dust and Scratches filter.
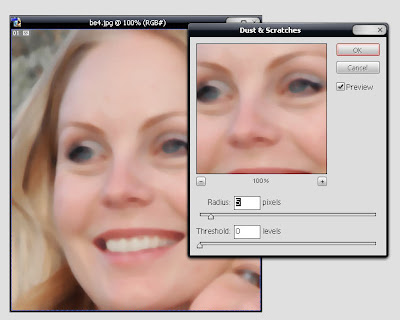
Filter > Noise > Dust & Scratches
For this example, I used a radius of 5 pixels and a threshold of 0. You can adjust these to suit your image as needed. The result you are looking for is a creamy blend of features, without too much banding of color.
You can adjust as necessary.
Step 3
The next filter to use is the Gaussion Blur. This will remove any banding that might have occurred in the previous step, and give the whole image a creamier complexion. Even coloring is what we are after.
Filter > Blur > Gaussion Blur
I used a radius around 2 for this example. Again, adjust as necessary for each image.
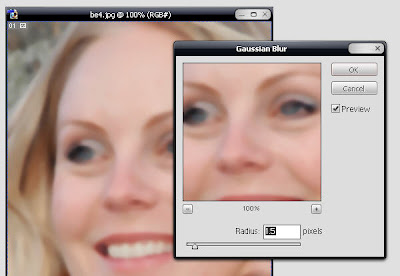
Step 4
The final step in preparing your photo's new complexion is to add subtle texture. Skin generally would not have a plastic or store-dummy complexion, so by adding some filter noise we will give the photo a more realistic look.
Note: If your looking to experiment with this step in your artwork,it can produce some interesting results with still subjects (doll-like complexions) .
Filter > Noise > Add Noise
I used an amout of 0.10% noise (minimum setting), select uniform with Monochromatic box selected. As always, adjust to suit your image or result you are happy with .
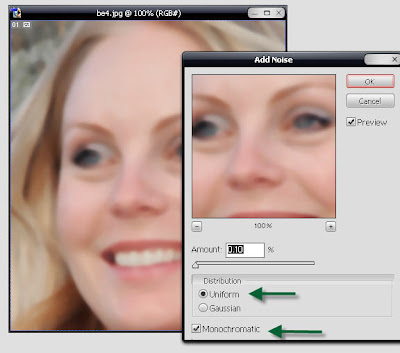
Step 5
We are now ready to digitally correct our photo with perfect skin !!!
Add a layer mask to the layer we have been filtering and fill it with black. This will cause the image to disappear and the layer beneath (the original) will show through.
Nothing to worry about - it's still there, it's just been hidden or 'masked' with black.
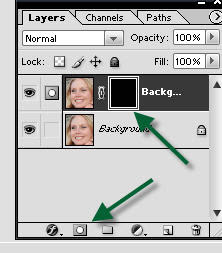
Step 6
In this step we get the 'paint' the new complexion right on. It is at this stage that a steady hand and attention to details comes to the forefront.Take your time in this step,If you have a WACOM TABLET this will be fun !!!!
Select the Brush Tool and make sure your colour is White. I chose a brush size of around 30 pixels and a hardness of 0%. You can adjust the size of your brush as you "paint" over the image in order to get into the tight corners etc.(hairline , around eyes , etc.)
The whole idea is to "cover" the old original skin with your new and improved skin.
If you do accidently paint over something you didn't really want to, simply change the brush colour BACK to black and you can erase your mistake.
This process is identical to working with Quick Mask Mode.
Step 7
After your finished "painting",you should see what has occured to the mask layer.
Step 8
Here you can "TWEAK" the color balance of your photo, just remember a little goes a long way,so I will add a Hue/Saturation Adjustment Layer.
Layer > New Adjustment Layer > Hue/Saturation
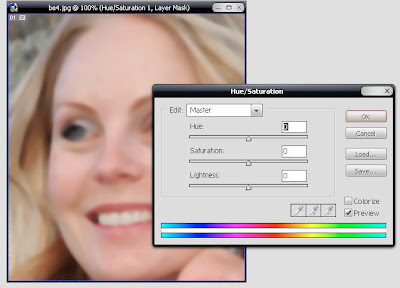
Step 9
Now you can try some PHOTO-style filters if you like, or go to next step.
Step 12
The final step is to apply sharpen to the image (just a little bit !!!).Instead of clicking on a SHARPNESS filter,we will do a simple and interesting step.
First, duplicate the original layer. Then, Simply drag the original layer onto the new layer button on the layers pallette . Set this new layer to Overlay the original.
APPLY High Pass filter to the new layer.
Filter > Other > High Pass
Use only a small amount, only to show detail.
Once that filter is applied you can adjust the opacity of the layer and it will increase/decrease the level of sharpening.
YOUR FINAL RESULT :
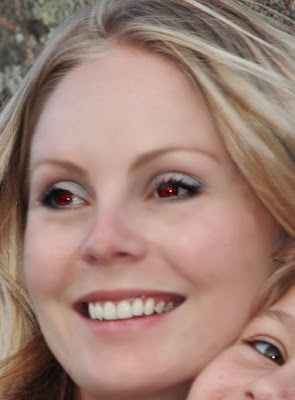
(I gave her DARKFLAME eyes,but hope this helps......)


No comments:
Post a Comment