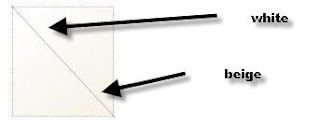
First create the thin border of the photograph OR image you choose.
Use the Rectangular Marquee Tool to draw a rectangle the shape of a photo.
Create a new layer and call it frame, fill the selection with a gradient going from white to beige (#F7F2E7) like in the picture below.
Or whatever shade coloring you are looking for.

Step 2:Create a new layer and call it mask, with the selection still active shrink the selection by 4 - 6 px.
Fill the selection with whatever color you like, we will use this layer as a layer mask for our real picture in the next step.
Step 3: Insert the image you want to use to create realistic photo, make sure the image is in a layer above the mask layer.
Hold down the Alt button and position the mouse between the mask layer and the picture layer, the mouse pointer should look like the picture to the left, now left click.
Your image should now only be visible inside the rectangle you created in the mask layer.Now you can resize and move the image as you like inside this rectangle.
Now you can resize and move the image as you like inside this rectangle.
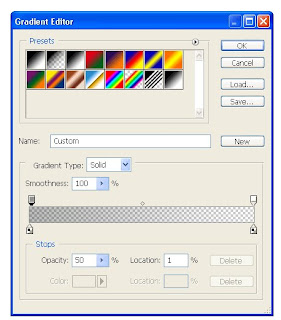
Step 4:Create a new layer and call it white gradient, set the foreground color to white, select the gradient tool and open the gradient editor.
Select the gradient called “Foreground to Transparent” which should be in your presets list.
Click the left Opacity stop and set the opacity to 50% as demonstrated in the picture bellow.

Step 5:Draw a gradient from the bottom right corner towards the upper left corner as demonstrated in the image bellow.
Change the foreground color to black and create a new layer and call it black gradient now create the same gradient but in the opposite corner.

Step 7:Instead of applying a basic drop shadow we will create a more realistic shadow.
Start by creating a new layer called shadow and place the shadow layer below the frame layer, click the frame layer preview.Right click the selection and select Make work path, set the tolerance to 10.
Step 8:Select the Path selection tool and add an anchor point on the right and bottom side of the path, to add an anchor point you simply right click the path and select Add anchor point.
Move the anchor points.
Step 9:Right click the path and select Make selection to transform it back to a selection.
Fill the selection with black and deselect by hitting ctrl + D, set the layer opacity to 50% and apply a gaussian blur (Filter > Blur > Gaussian blur) with about 6px in radius.


No comments:
Post a Comment